Has your once-efficient robot vacuum started to lose its sparkle, cutting cleaning sessions short or struggling to find its way back to the charging dock? It’s a common dilemma, and more often than not, the culprit isn’t a complex malfunction but a simple worn-out battery. Just like any other rechargeable device, your diligent floor-cleaning companion has a power source that, over time, loses its capacity.
The good news? Replacing your robot vacuum’s battery is far simpler than you might imagine, requiring minimal tools and no advanced technical skills. Instead of consigning your beloved robot to the e-waste pile, a new battery can breathe fresh life into it, restoring its performance to near-new levels. This comprehensive guide will walk you through everything you need to know, from recognizing the signs of a dying battery to a step-by-step replacement process and essential post-installation care, helping you keep your home spotless without breaking the bank.
Robot Vacuum Cleaners: Understanding Their Power Source
Robot vacuum cleaners are designed to simplify your life, autonomously navigating your home to keep floors tidy. At the heart of this convenience lies a powerful, rechargeable battery, enabling hours of hands-free cleaning. But why is the battery such a critical component, and how does its health impact your robot’s overall performance?
What is a Robot Vacuum Cleaner?
|
Our Picks for the Best Robot vacuum cleaner in 2026
As an Amazon Associate I earn from qualifying purchases.
|
||
| Num | Product | Action |
|---|---|---|
| 1 | ILIFE V2 Robot Vacuum Cleaner, Tangle-Free Suction, 120 Mins Runtime, Slim, Self-Charging Robotic Vacuum Cleaner, Ideal for Pet Hair and Hard Floors |

|
| 2 | roborock Qrevo Series Robot Vacuum and Mop, 8000Pa Suction, Upgraded from Qrevo S, Anti-Tangle Brushes, Smart Obstacle Avoidance, Auto Mop Washing, All-in-One Dock, 200RPM Spinning Mops, Black(QV 35A) |
|
| 3 | roborock Q7 M5+ Robot Vacuum and Mop, Upgraded from Q5 Max+, Up to 7-9 Weeks Self-Empty, 10000Pa Suction, Dual Anti-Tangle System for Pet Hair & Carpet, PreciSense LiDAR Navigation, App Control, Black |
|
| 4 | Robot Vacuum and Mop, Mapping Robotic Vacuums Cleaner with LiDAR Navigation Smart & Strong Suction, WiFi/App/Alexa/Voice Control, Obstacle Avoidance, for Home, Wood/Hard Floors, Pet Hair -Gray |
|
| 5 | Tikom Robot Vacuum and Mop, 6000Pa Robotic Vacuum Cleaner with Self-Emptying Base, 90 Days Capacity, LiDAR Navigation, Home Mapping, Ideal for Pet Hair, Hard Floors, Carpet (L8000 Plus) |
|
| 6 | Shark Matrix Clean | Robot Vacuum Cleaner with Powerful Suction for Pet Hair, Rugs, Carpets & Hard Floors | Self-Empty Base | 60-Day Capacity | Voice Control | LiDAR Navigation | Cool Grey | AV2511AE |
|
| 7 | Tikom Robot Vacuum and Mop Combo, 5000Pa Robotic Vacuum Cleaner, 150 Min Max, App & Remote Control, Ideal for Hard Floor, Carpet, Pet Hair, Self-Charge(G8000 Max) |
|
| 8 | SHELIKI Robot Vacuum and Mop Combo, 3-in-1 Robotic Vacuums Cleaner with 70-Day Self-Emptying Base, LiDAR Navigation Smart Mapping & Strong 6000Pa Suction, for Pet Hair, Hard Floor, Carpet |
|
| 9 | eufy Robot Vacuum 11S MAX, Super Thin, Powerful Suction, Quiet, Self-Charging Robotic Vacuum Cleaner, Cleans Hard Floors to Medium-Pile Carpets, Black |
|
| 10 | Robot Vacuum and Mop Combo, 2 in 1 Robot Vacuum Cleaner with WiFi/App, Smart Robotic Vacuums with Strong Suction, Schedule, Self-Charging, Slim, Quiet, Ideal for Hard Floor, Pet Hair, Low Pile Carpet |
|
A robot vacuum cleaner is an autonomous device equipped with brushes, a vacuum motor, and sometimes a mopping function, designed to clean floors without direct human supervision. These smart devices rely entirely on their internal battery for power, allowing them to map your home, avoid obstacles, and return to their charging base independently.
Why Battery Health Matters
The battery dictates how long your robot vacuum can clean, how efficiently it navigates, and even its ability to complete a cleaning cycle. A healthy battery ensures consistent power output, allowing the motors to run effectively, the suction to remain strong, and the navigation sensors to function optimally. As a battery degrades, these essential functions are compromised, leading to a noticeable decline in cleaning performance and overall user experience.
When to Replace Your Robot Vacuum Battery
Understanding when your robot vacuum battery needs replacing can save you from unnecessary frustration and prevent you from prematurely discarding an otherwise functional device. Most robot vacuum batteries are designed to last between 2 to 4 years under normal usage conditions, though this can vary from 1.5 to 5 years depending on the model, usage frequency, and battery type.
Here are the tell-tale signs that it might be time for a battery swap:
- Significantly Reduced Cleaning Time: If your robot used to clean for an hour but now only manages 15-20 minutes, its battery capacity has likely diminished.
- Shuts Down Mid-Cycle: The robot stops cleaning and powers off before completing its scheduled task, often far from its charging dock.
- Struggles to Return to Charging Dock: It might wander aimlessly or get “lost” on its way back to the base, indicating insufficient power.
- Won’t Charge to 100%: The battery indicator never reaches full, or it drains very quickly after appearing fully charged.
- Error Messages: Your robot’s app or display might show specific error codes related to power or charging issues.
While occasional short runtimes can be due to dirty filters or clogged brushes, if these issues persist after basic maintenance, battery aging is usually the primary reason. Replacing the battery is often a cost-effective solution, especially if your robot is under five years old and its navigation, motors, and sensors are still in good working order.
Types of Robot Vacuum Batteries
Understanding the different battery types used in robot vacuums is crucial for selecting the correct replacement and ensuring optimal performance. Primarily, you’ll encounter two main chemistries: Nickel-Metal Hydride (NiMH) and Lithium-ion (Li-ion).
Nickel-Metal Hydride (NiMH) Batteries
NiMH batteries were common in older or more budget-friendly robot vacuum models. While reliable, they generally have a shorter lifespan and can suffer from a “memory effect” if not fully discharged before recharging, which can reduce their overall capacity over time.
Lithium-Ion (Li-ion) Batteries
Most modern robot vacuums utilize Li-ion batteries, including variations like Lithium Nickel Manganese Cobalt Oxide (NMC) and LiFePO4 (Lithium Iron Phosphate). These are preferred for several reasons:
- Higher Energy Density: They store more energy in a smaller, lighter package.
- Longer Lifespan: Li-ion batteries typically last longer and offer more charge cycles (500-1000 cycles) compared to NiMH.
- No Memory Effect: They can be recharged at any point without impacting their long-term capacity.
- Quicker Charging: Li-ion batteries generally charge faster.
Important Considerations for Replacement: When choosing a replacement battery, it’s vital to match the voltage, capacity (mAh), connector type, and physical size of your original battery. Blindly upgrading voltage or capacity without ensuring exact compatibility can potentially damage the robot’s control board or charging system. Always consult your robot’s user manual or the manufacturer’s website to confirm the correct specifications.
Tools and Preparations for DIY Battery Replacement
Replacing your robot vacuum’s battery is a straightforward task, but a little preparation goes a long way. You’ll likely find that you already own most of the necessary equipment.
Essential Tools
- Small Phillips-head screwdriver: This is typically the only tool you’ll need, as most robot vacuums use these screws to secure the battery compartment.
- Soft cloth or towel: To protect your robot vacuum from scratches when it’s flipped over.
Safety Checklist
Before you begin, prioritize safety to prevent any damage to yourself or your device:
- Power Off the Robot: Ensure the robot vacuum is completely turned off. This usually involves pressing and holding the power button until it shuts down.
- Unplug from Charging Dock: Remove the robot from its charging station.
- Work on a Clean, Flat Surface: A well-lit, stable surface will make the process much easier and safer.
Choosing Your Replacement Battery: OEM vs. Third-Party
When sourcing a new battery, you’ll generally have two options:
- OEM (Original Equipment Manufacturer) Batteries: These are made by your robot vacuum’s manufacturer. They offer guaranteed compatibility and often come with a warranty, but typically at a higher price.
- Third-Party Batteries: These are more affordable alternatives from other manufacturers. Quality can vary significantly, so it’s crucial to choose a reputable seller and verify that the battery matches the voltage, capacity (mAh), connector type, and physical size of your original battery. While using a third-party battery might void your warranty, it’s often the most economical choice for older models where OEM parts are harder to find or prohibitively expensive.
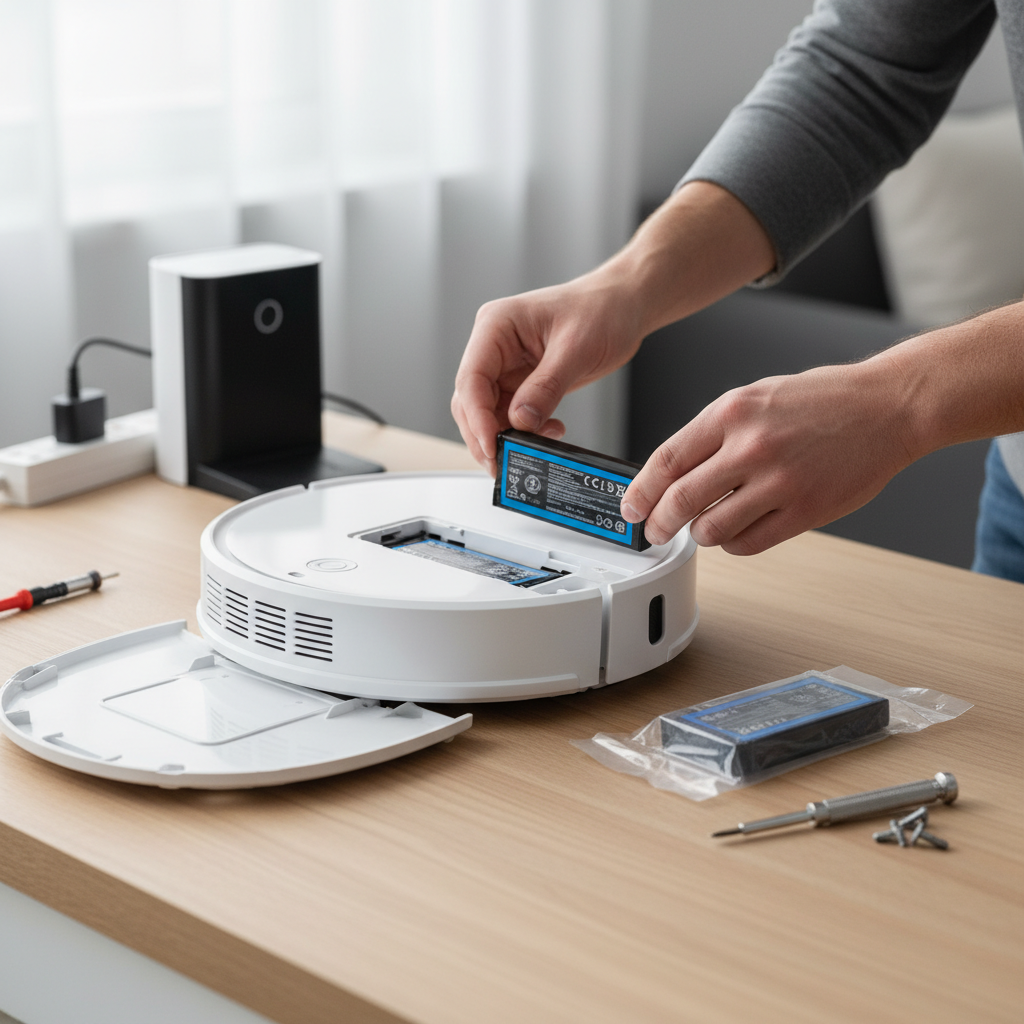
Step-by-Step Guide to Replacing Your Robot Vacuum Battery
Ready to give your robot vacuum a new lease on life? Follow these simple steps carefully, and you’ll have it back to cleaning in no time. While specific models may vary slightly, this general procedure applies to most robot vacuums.
- Power Off the Robot and Unplug: As a crucial safety measure, ensure your robot vacuum is completely powered off and disconnected from its charging dock.
- Flip the Robot Over: Gently place your robot vacuum upside down on a soft, clean surface, like a towel, to prevent scratches.
- Remove the Edge-Sweeping Brush (If Applicable): Many models have a small side brush that needs to be unscrewed and removed to access the bottom cover. Use your Phillips-head screwdriver for this.
- Remove the Bottom Cover: Locate the screws holding the main bottom cover in place. There are typically 4-5 screws. Use your Phillips-head screwdriver to loosen and remove them. Carefully lift off the bottom cover.
- Disconnect the Old Battery: Once the bottom cover is off, you’ll see the battery pack. It’s usually a rectangular block connected by a wire harness. Gently unplug the battery connector from its socket. Always pull on the connector itself, not the wires, to avoid damage.
- Remove the Old Battery: Lift the old battery out of its compartment. It might be held in by a retainer or simply sit snugly.
- Insert the New Battery: Place the new battery into the compartment, ensuring it’s oriented correctly. Make sure it fits snugly without forcing it.
- Reconnect the New Battery Cable: Firmly connect the new battery’s plug into the robot’s corresponding socket until it is fully seated. Double-check that the connection is secure.
- Replace the Bottom Cover: Carefully align the bottom cover and place it back onto the robot. Tighten all the screws, ensuring they are snug but not overly tight to avoid stripping the plastic threads. Make sure the cover is flush with all sensors.
- Reattach the Edge-Sweeping Brush: If you removed the side brush in step 3, screw it back into place.
- Power On and Charge: Flip your robot vacuum back over and place it on its charging station. The robot should power on and begin charging, “waking up” with its new power source.
After Installing the New Battery: Calibration and Care
Congratulations, you’ve successfully replaced your robot vacuum’s battery! To ensure its longevity and optimal performance, a few crucial steps and ongoing care practices are necessary.
Post-Installation Steps
- Full Charge Before First Use: Allow the robot to fully charge before its initial cleaning run. This helps calibrate the new battery.
- Complete a Full Cleaning Cycle: Let your robot vacuum run a complete cleaning cycle without interruption. This helps the robot’s system recognize and calibrate the new battery’s capacity.
- Full Recharge After Cycle: After the cleaning cycle, let the robot return to its dock and fully recharge again. Some models might recommend one or two full clean-and-charge cycles for proper calibration.
Extending Your Battery’s Lifespan
Just like any battery, proper care can significantly extend its life:
- Avoid Extreme Temperatures: Keep your robot vacuum away from extreme heat or moisture, as these can degrade battery health.
- Clean Charging Contacts: Regularly wipe the charging contacts on both the robot and its dock to ensure a consistent connection.
- Optimal Storage Charge: If you plan to store your robot for an extended period (months), ensure the battery is charged to 40-60%. Avoid storing it at 0% or 100% charge.
Battery Disposal
Rechargeable batteries contain materials that are harmful to the environment. Never throw them in household trash. Instead, recycle them at authorized collection points or specialized e-waste facilities in your area.
Common Mistakes to Avoid
A DIY battery replacement is straightforward, but steering clear of common pitfalls will ensure a smooth process and a healthy robot vacuum.
- Using a Battery with Incorrect Voltage: This is perhaps the most critical mistake. A voltage mismatch can severely damage your robot’s internal electronics. Always match the voltage exactly.
- Buying Ultra-Cheap, Uncertified Batteries: While saving money is appealing, extremely cheap batteries often lack quality control, safety features, and accurate specifications, potentially leading to poor performance or even safety hazards.
- Skipping the First Full Charge: Rushing to use your robot before a full initial charge can hinder proper battery calibration and potentially shorten its overall lifespan.
- Pulling Battery Wires Instead of Connectors: Always grip the plastic connector firmly when disconnecting the battery. Pulling on the wires can cause them to fray, detach, or create shorts.
- Overtightening Screws: Tighten screws until snug, but avoid excessive force. Overtightening can strip plastic threads, making future maintenance difficult and potentially damaging the robot’s casing.
- Incorrect Polarity (if splicing connectors): If you ever need to splice wires due to a connector mismatch (which is generally not recommended unless you have electronics experience), ensure you match the positive and negative terminals correctly. Cut and work on only one wire at a time to prevent accidental short circuits.
Troubleshooting After Battery Replacement
Even with the best intentions, issues can sometimes arise after replacing a battery. Here’s a quick troubleshooting guide for common problems:
| Problem | Possible Cause | Solution |
|---|---|---|
| Robot won’t turn on | Loose battery connector | Reopen cover and reseat connector |
| Runtime still short | Dirty filter or brushes | Clean or replace consumables |
| Charging error | Incompatible battery | Verify voltage and connector with original battery |
| Stops mid-clean | Calibration needed | Run full clean + recharge cycle |
Conclusion
Giving your robot vacuum cleaner a new battery is one of the most effective and eco-friendly ways to extend its life and maintain a consistently clean home. It’s a testament to how simple, proactive maintenance can save you both time and money, transforming a seemingly complex “repair” into a satisfying DIY project. By understanding the signs of battery degradation, selecting the right replacement, and following a few straightforward steps, you can easily restore your automated helper to its peak performance.
So, if your robot vacuum isn’t moving with the same pep it once did, remember that a new battery might be all it needs. Isn’t it empowering to know you can tackle this common issue yourself, keeping your floors spotless for years to come?
Frequently Asked Questions
Can I use a higher-capacity battery (more mAh) than the original?
You can generally use a higher-capacity battery (higher mAh) as long as the voltage, physical size, and connector type match your original battery exactly. While a higher capacity may offer longer runtime, be aware that it could potentially affect charging behavior or the robot’s ability to precisely monitor battery levels in some models.