Few things are as disruptive to a peaceful home as the persistent, high-pitched squeak of your diligent robot vacuum cleaner. What begins as a subtle whisper can quickly escalate into an irritating symphony, turning your automated cleaning helper into a noisy nuisance. But before you banish your robot to the closet or consider an expensive repair, know that many squeaky robot vacuum wheel issues can be resolved with a bit of DIY TLC. As someone with over a decade of hands-on experience in robot vacuum maintenance, I’m here to guide you through the process, helping you restore tranquility to your home and efficiency to your cleaning routine.
Why Do Your Robot Vacuum Wheels Squeak?
A squeak is often your robot vacuum’s way of signaling that something isn’t quite right within its wheel mechanisms. Understanding the root cause is the first step toward a successful fix.
The most common culprit behind a squeaking sound is the accumulation of debris such as hair, dust, lint, or pet fur tightly wrapped around the wheel axles or lodged within the wheel housing. Over time, this buildup creates friction against the moving parts, leading to that tell-tale squeal. Imagine a tiny obstacle course for your robot’s wheels, constantly rubbing and grinding. This friction, rather than smooth motion, generates the unwelcome noise.
Another factor can be a lack of lubrication. While most robot vacuum wheels are designed for relatively low-maintenance operation, constant use can wear down any existing lubrication, or the parts may simply dry out, increasing metal-on-plastic or plastic-on-plastic friction points.
In some cases, the squeaking might indicate worn-out parts or minor issues with the internal motor that drives the wheels. If components like bushings or bearings have degraded, they can no longer provide smooth movement. Additionally, sometimes the squeaking isn’t even from the main drive wheels; the front caster wheel is a frequent source of noise, as is the side brush module, which can also accumulate hair and debris, causing a similar high-pitched sound.
“The vast majority of robot vacuum squeaks stem from simple debris accumulation. A thorough cleaning is often all it takes to silence the annoyance.”
Essential Tools and Materials for DIY Repair
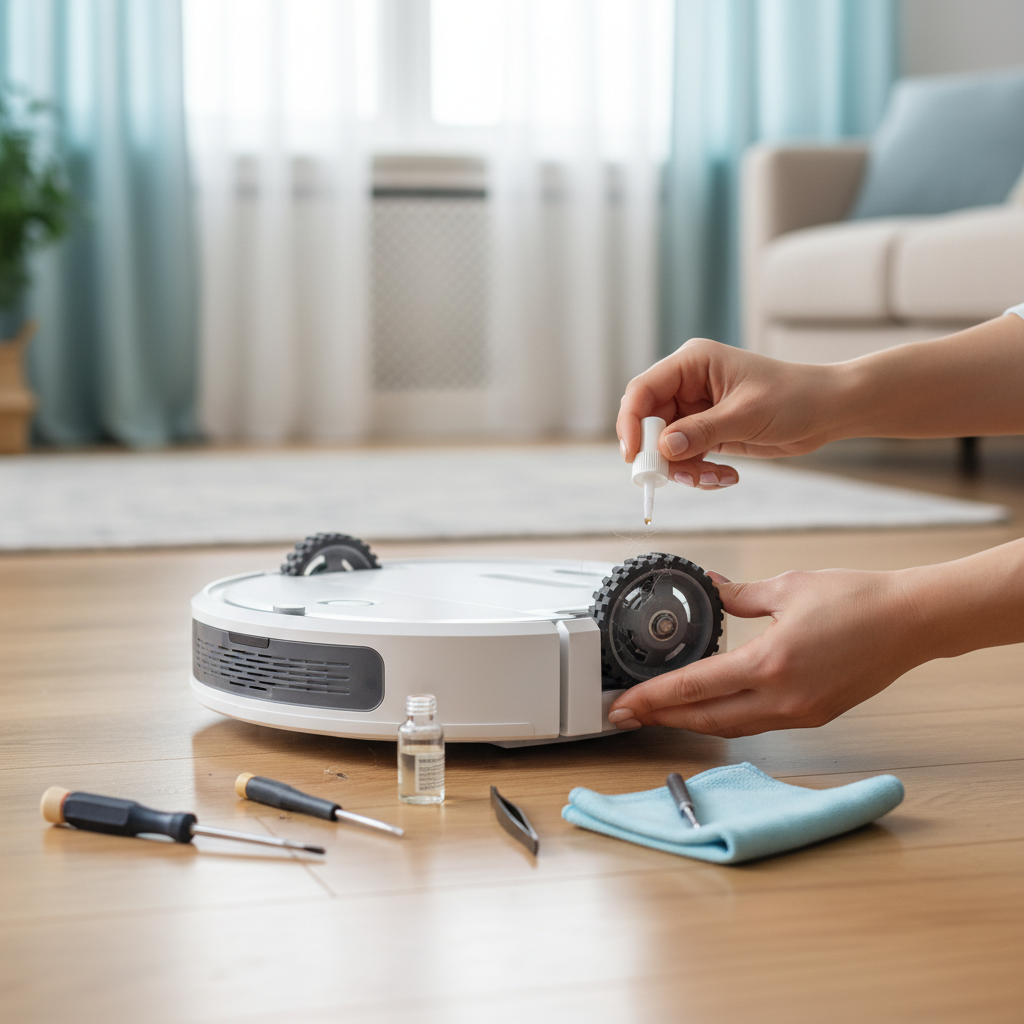
Before you embark on your robot vacuum’s wheel rehabilitation, gather the following essential tools and materials. Having everything on hand will make the process smoother and more efficient:
- Small Phillips Head Screwdriver: Essential for removing the bottom panel to access the main drive wheels.
- Small Flathead Screwdriver: May be useful for gently prying open components or removing stubborn debris.
- Tweezers or a Small Hook Tool: Invaluable for extracting tangled hair, lint, and other fine debris from tight spaces around axles and bearings.
- Cleaning Brush (e.g., an Old Toothbrush): Perfect for scrubbing away dirt and dust from wheel surfaces and housings.
- Microfiber Cloth: For wiping down components and ensuring they are clean and dry before reassembly or lubrication.
- Dry Lubricant (Silicone Spray or Teflon Spray): Crucial for reducing friction without attracting more dust. Ensure it’s a dry formula.
- Optional: Lint Roller or Adhesive Tape: Can help pick up loose debris from the robot’s underside or removed parts.
Step-by-Step Guide to Silencing Squeaky Robot Vacuum Wheels
Fixing squeaky robot vacuum wheels is a rewarding DIY task that can significantly extend your device’s lifespan and improve your home environment. Follow these steps carefully to ensure a successful repair.
1. Safety First: Power Down Your Robot
|
Our Picks for the Best Robot vacuum cleaner in 2026
As an Amazon Associate I earn from qualifying purchases.
|
||
| Num | Product | Action |
|---|---|---|
| 1 | roborock Q7 M5+ Robot Vacuum and Mop, Upgraded from Q5 Max+, Up to 7-9 Weeks Self-Empty, 10000Pa Suction, Dual Anti-Tangle System for Pet Hair & Carpet, PreciSense LiDAR Navigation, App Control, Black |

|
| 2 | Robot Vacuum and Mop, Mapping Robotic Vacuums Cleaner with LiDAR Navigation Smart & Strong Suction, WiFi/App/Alexa/Voice Control, Obstacle Avoidance, for Home, Wood/Hard Floors, Pet Hair -Gray |
|
| 3 | Shark Matrix Clean | Robot Vacuum Cleaner with Powerful Suction for Pet Hair, Rugs, Carpets & Hard Floors | Self-Empty Base | 60-Day Capacity | Voice Control | LiDAR Navigation | Cool Grey | AV2511AE |
|
| 4 | Tikom Robot Vacuum and Mop Combo, 5000Pa Robotic Vacuum Cleaner, 150 Min Max, App & Remote Control, Ideal for Hard Floor, Carpet, Pet Hair, Self-Charge(G8000 Max) |
|
| 5 | roborock Qrevo Series Robot Vacuum and Mop, 8000Pa Suction, Upgraded from Qrevo S, Anti-Tangle Brushes, Smart Obstacle Avoidance, Auto Mop Washing, All-in-One Dock, 200RPM Spinning Mops, Black(QV 35A) |
|
| 6 | ILIFE V2 Robot Vacuum Cleaner, Tangle-Free Suction, 120 Mins Runtime, Slim, Self-Charging Robotic Vacuum Cleaner, Ideal for Pet Hair and Hard Floors |
|
| 7 | Robot Vacuum and Mop Combo, 2 in 1 Robot Vacuum Cleaner with WiFi/App, Smart Robotic Vacuums with Strong Suction, Schedule, Self-Charging, Slim, Quiet, Ideal for Hard Floor, Pet Hair, Low Pile Carpet |
|
| 8 | Tikom Robot Vacuum and Mop, 6000Pa Robotic Vacuum Cleaner with Self-Emptying Base, 90 Days Capacity, LiDAR Navigation, Home Mapping, Ideal for Pet Hair, Hard Floors, Carpet (L8000 Plus) |
|
| 9 | SHELIKI Robot Vacuum and Mop Combo, 3-in-1 Robotic Vacuums Cleaner with 70-Day Self-Emptying Base, LiDAR Navigation Smart Mapping & Strong 6000Pa Suction, for Pet Hair, Hard Floor, Carpet |
|
| 10 | eufy Robot Vacuum 11S MAX, Super Thin, Powerful Suction, Quiet, Self-Charging Robotic Vacuum Cleaner, Cleans Hard Floors to Medium-Pile Carpets, Black |
|
Before you begin any maintenance or disassembly, always prioritize safety. First, turn off your robot vacuum completely. Many models have a physical power switch, usually on the side or underside. Next, remove the battery. This prevents accidental activation during the repair process and protects you and the robot from potential electrical issues.
2. Identify the Squeaky Wheel
Pinpointing the exact source of the squeak can save you time. Flip your robot vacuum over and gently spin each wheel manually. Listen closely to identify which wheel, or even which part of a wheel assembly, is producing the noise. Don’t forget to check the front caster wheel and the side brushes, as these are common culprits. Sometimes, the squeak only occurs under load, so after a visual inspection, a quick test run before full disassembly might help confirm the noisy component.
3. Accessing and Cleaning the Front Caster Wheel
The front caster wheel is often the easiest to access and a frequent source of squeaks due to its constant contact with the floor and its tendency to collect debris.
- Removal: On many robot vacuum models, you can firmly pull the front caster wheel assembly straight out from its housing [cite: iRobot search result 1]. It’s typically designed for easy, tool-free removal.
- Disassembly: Once removed, inspect the assembly. You might be able to pop the wheel out of its plastic housing by pushing firmly on the axle. Some older or specific models may not allow for complete axle removal.
- Cleaning: Use your tweezers or a small hook tool to carefully remove any tangled hair, lint, or debris wrapped around the axle or inside the wheel’s cavity. Use a cleaning brush (like an old toothbrush) to scrub away any stuck-on dirt from the wheel itself and its housing. Wipe all parts clean with a microfiber cloth.
- Reassembly: Reinstall the wheel into its housing, ensuring the axle snaps securely into place on both sides. Then, push the entire caster wheel assembly back into the robot until it clicks firmly.
4. Addressing Squeaky Main Drive Wheels
The main drive wheels are more integrated into the robot’s chassis and usually require a bit more effort to access.
- Removing the Bottom Cover: Carefully flip your robot vacuum over and locate the screws holding the bottom cover in place. Use your Phillips head screwdriver to remove all visible screws. Keep them organized to ensure an easy reassembly. Gently lift off the bottom plate.
- Accessing Wheel Modules: Beneath the cover, you’ll see the main drive wheel modules. These are typically self-contained units. In some cases, you can disconnect them by squeezing a connector and wiggling them out [cite: Shark Robot Vacuum YouTube search result 5]. Other models may require further screw removal to detach the module.
- Cleaning Around Axles and Mechanisms: Once the wheel modules are exposed or removed, meticulously clean around the axles, gears, and any other moving parts. Use tweezers to pull out any hair or debris that has worked its way into these areas. An old toothbrush can help dislodge stubborn dirt.
- Inspecting for Damage: While cleaning, take a moment to inspect the wheels and surrounding mechanisms for any signs of physical damage, cracks, or excessive wear. If parts appear significantly damaged, a replacement module might be necessary.
5. Applying the Right Lubrication
Lubrication is key to reducing friction and silencing squeaks, but the type of lubricant matters greatly for robot vacuums.
- Choose Wisely: Always opt for dry lubricants such as silicone spray or Teflon spray [cite: Roomba Reddit search result 1, FTC Reddit search result 2]. These formulas create a low-friction barrier without attracting dust and debris, which can worsen the problem over time.
- Avoid Wet Lubricants and WD-40: It’s crucial to avoid wet lubricants like oil or grease, as they act as magnets for dust, lint, and pet hair, leading to even more severe blockages and noise [cite: Roomba Reddit search result 1, FTC Reddit search result 2]. While some sources mention WD-40 as a temporary fix, it’s primarily a solvent and penetrant, not a long-lasting lubricant, and it can dissolve existing grease in bearings, potentially causing more harm than good in the long run [cite: FTC Reddit search result 2]. If WD-40 is all you have, use it very sparingly and understand it’s a short-term solution.
- Application: Apply the dry lubricant sparingly to the axles and any pivot points where plastic or metal parts rub together. Use the thin straw attachment often provided with spray cans for precise application. Spin the wheels manually after application to help distribute the lubricant evenly.
6. Reassembly and Testing
Once cleaning and lubrication are complete, it’s time to put your robot vacuum back together.
- Reassemble Carefully: Reattach the wheel modules, ensuring all connectors are securely fastened and screws are tightened. Replace the bottom cover, making sure all screws are in their correct positions and tightened snugly, but do not overtighten, as this can strip the plastic.
- Reinstall Battery: Insert the battery back into its compartment and turn on your robot.
- Perform a Test Run: Run your robot vacuum through a short cleaning cycle. Listen carefully to confirm that the squeaking noise has disappeared. If it persists, re-examine the wheels and brushes to ensure no debris was missed and lubrication was applied correctly. Sometimes a second pass at cleaning can make all the difference.
When to Seek Professional Help or Consider Replacement
While DIY fixes are often effective, there are instances where professional intervention or even replacement might be the best course of action for your robot vacuum.
If you’ve meticulously followed all the cleaning and lubrication steps, yet the squeaking persists or new noises emerge, it could indicate a more complex underlying issue. This might involve internal motor problems, damaged gears, or worn-out bearings that are not easily accessible or replaceable by a typical DIY enthusiast. Visible damage to the wheel modules, such as cracks or broken components that cannot be easily mended, also points towards a need for professional assessment.
If your robot vacuum is still under warranty, it is always advisable to contact the manufacturer’s customer support. Attempting extensive DIY repairs on a warranted device could void your warranty, so it’s best to check their policies first. For older models, or if the cost of professional repair approaches the price of a new unit, considering a replacement might be more economical in the long run. Modern robot vacuums often offer enhanced features, improved efficiency, and quieter operation, making an upgrade a worthwhile investment for a truly silent cleaning experience.
Preventative Maintenance: Keeping Your Robot Vacuum Quiet
An ounce of prevention is worth a pound of cure, especially when it comes to keeping your robot vacuum’s wheels free of squeaks. Regular, proactive maintenance can save you from future frustrations and prolong the life of your device.
Regular Cleaning Schedule: Make it a habit to check and clean your robot vacuum’s wheels and brushes at least once a week, or more frequently if you have pets or long-haired occupants. This helps prevent the buildup of hair, dust, and debris that are the primary causes of squeaking.
Post-Run Inspection: After each cleaning cycle, take a quick glance at the main brushes, side brushes, and wheels. It only takes a moment to spot visible hair or larger debris that could quickly become problematic if ignored. Early removal prevents material from getting tightly wound and harder to extract later.
Periodical Module Inspection: Every few months, consider performing a more thorough inspection. This involves removing the bottom panel and taking out the wheel modules, similar to the DIY repair steps, to clean areas that aren’t visible during a quick check. This deeper clean ensures that fine dust and particles don’t accumulate in hidden crevices. By integrating these simple habits into your routine, you can ensure your robot vacuum remains a quiet, efficient helper for years to come.
Conclusion
A squeaky robot vacuum doesn’t have to be a permanent fixture in your home. By understanding the common causes, equipping yourself with the right tools, and following a straightforward DIY guide, you can often silence those annoying noises yourself. From meticulously cleaning debris from axles to applying appropriate lubrication, these simple steps can restore your robot’s quiet efficiency. Regular preventative maintenance is your best defense against future squeaks, ensuring your automated cleaner remains a helpful, unobtrusive presence. Why not make checking your robot vacuum’s wheels a part of your regular home maintenance?
Frequently Asked Questions
Is WD-40 safe for robot vacuum wheels?
While WD-40 might offer temporary relief for squeaky robot vacuum wheels, it is generally not recommended as a long-term lubricant. It is primarily a solvent and penetrant, which can attract dust and debris, potentially worsening the problem over time or even dissolving existing grease in internal bearings.
How often should I clean my robot vacuum wheels?
It is advisable to check and clean your robot vacuum wheels at least once a week, especially if you have pets or long hair in your household. A deeper clean involving partial disassembly every few months can prevent long-term debris buildup.
Can I replace robot vacuum wheels myself?
Yes, replacing robot vacuum wheels can often be a DIY task. Many manufacturers offer replacement wheel modules, and with the right tools and a bit of patience, you can typically install them by following specific instructions for your robot model.
What if the squeaking isn’t coming from the wheels?
If the squeaking persists after cleaning and lubricating the wheels, check other moving parts. The side brush module is a common alternative source of noise, often due to tangled hair. Also, inspect the main brushroll and its bearings for any obstructions or wear.
What types of robot vacuums are most prone to squeaky wheels?
Any robot vacuum can develop squeaky wheels, but models that are heavily used, operate in environments with a lot of pet hair or long human hair, or those that haven’t received regular maintenance tend to be more susceptible to noise from debris accumulation.